
Solidworks Entry #1
To start, we need to familiarize ourselves with the landscape. For the purposes of this series, we'll be using Solidworks 2016. Other versions can be used and most information will remain consistent, but some things will be different across versions, such as the GUI and more advanced commands.
With that disclaimer out of the way, we can focus on creating our first objects. In this series, we'll create a set of parts which, when put into an assembly, will make the logo for The Source. There will also be information on 3D printing the final object.
Before we can start on the main item, however, we should make a few test objects to familiarize ourselves with the basic functions.
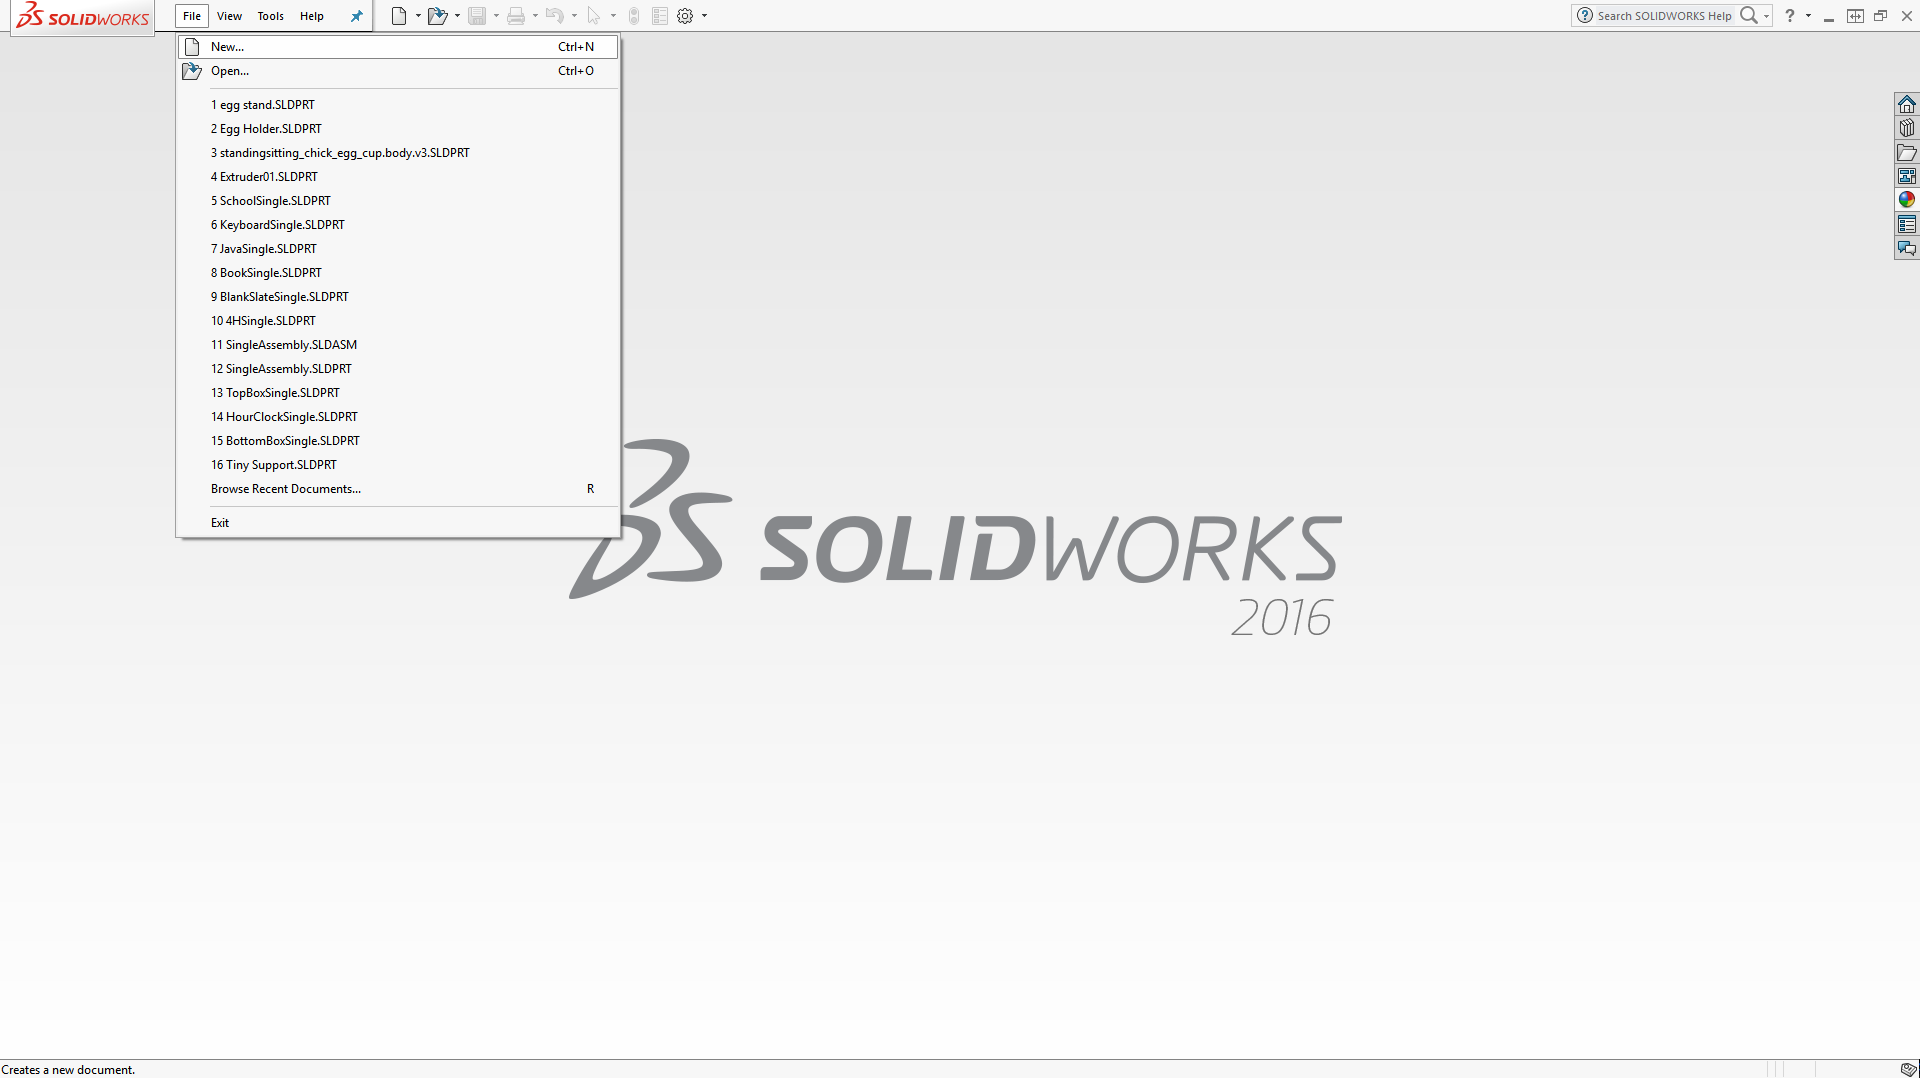
To start with, open up Solidworks and click "File." In the dropdown box below, press "New" to create a new object.
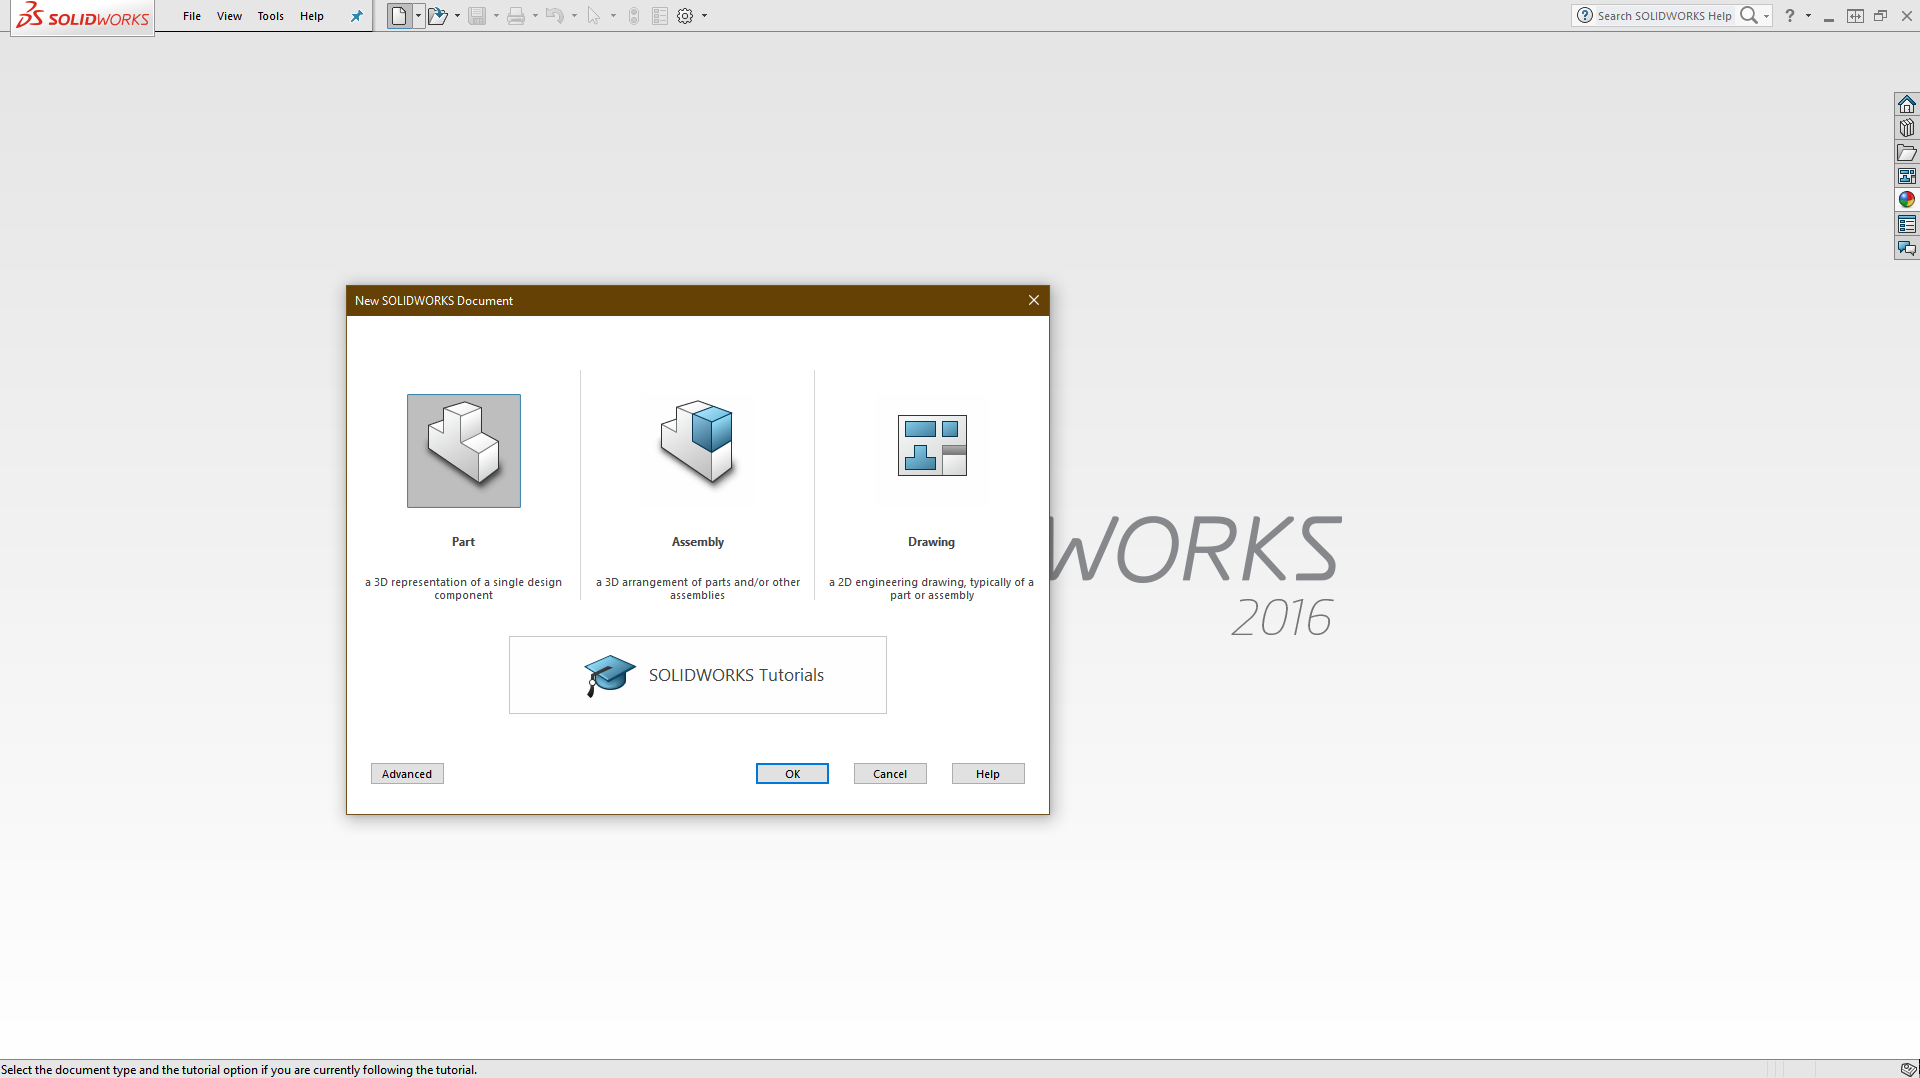
You should presented with a box containing 3 options for new objects that you can create: Parts, Assemblies, and Drawings. We'll explore the other options later, but for now, click "Part."
Posted 2:17pm 7/1/17